| Home > Support > Data Loss Prevention > Maintaining Your System > Organising Disk Drive Partition > How to Partition |
Using Windows Disk Management
Partition Using Windows Disk Management
Before you start to partition :
Unfortunately, partitioning wipes out all the data on your hard disk. Therefore you need to copy all your data onto a separate storage media, removable disks and such, before you can proceed to partition your drive. Of course, if you are installing a new drive, you do not need to bother with backing up since there is nothing there anyways.
There are of course, other things to do before you start partitioning:
- Have you set the jumpers, and secured cables properly? (Sata hard disk users need not apply)
- Have you backed-up data on the drive?
- Have you decided on what you are going to use the drive for? (Video? Storage?)
- Have you planned your partitions? (Videos need larger storage, than say word documents)
- Have you decided on the file system? (NTFS for security, FAT for synchronicity with older Window systems)
Once you have checked and planned on your partitions, it’s time start.
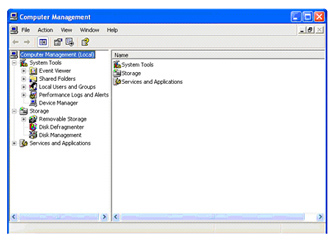
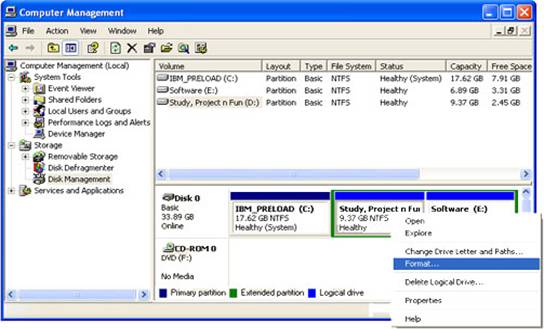
How to open Windows Disk Management
Open Start menu
Choose Run
Type in compmgmt.msc
From the drop down tree menu, choose Disk Management
Now, you will be able to see your drives and their properties such as capacity, free space, file system.

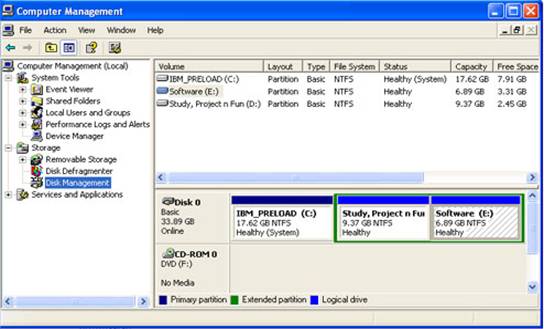
How to partition using Windows Disk Management
A. What is your need?
- If you want to create a new partition, right click on the unallocated space you want to use to create a new partition and choose New Partition.
- If you want to create a new logical drive on the extended partition, right click on the free space within the partition you want to create a new logical drive and choose New Logical Drive :
- Primary partition: a partition that can be used as a system partition where Windows and Operating systems can start.
- Extended partition: a portion of a Master Boot Record (MBR) basic disk that contains logical drive(s). This is created when more than 4 volumes on MBR basic disk are needed.
- Logical drive: a volume can be created in a MBR basic disk within the extended partition.
- A New Partition Wizard appears.
B. If you want to create a new partition
- Click Next
- Choose the type of partition you want to create (i.e. 2 options: Primary partition , Extended partition. Logical drive option is disabled)
- Specify the capacity for the partition: Notice that the size of the partition must be in MB , not GB . So you should be careful when typing in the size for the partition. There will be a maximum and minimum value for the size shown, so you should mind these values when typing the number. Decimal value, however, is invalid.
- Click Next.
If you are creating a Primary partition:
- You will need to assign an alphabet for a new partition. However, this can be done automatically by the system. Mount option will be available if you are using NTFS file system.
- Click Next. You will then have to choose the formatting option for a new partition. Default settings should work well if you do not need to specify any new file system (in case you are having FAT32 file) or change any information of the settings. You can select Perform a quick format if want to.
- Set the name for a new partition (i.e. Volume label - this is optional)
If you are creating an Extended partition: Go to the next step
- New window appears to summarize the information on a new partition to be created. By clicking on the Finish button, user has confirmed on creating a new partition.
- The process for partitioning will then be automatically run.
C. If you want to create a new Logical Drive
The procedure is similar to the above (for creating new Primary Partition). However, when you come to choose the type of partition you want to create at the beginning, radio buttons for Primary and Extended Partition are disabled since Logical Drive is only created within the available Extended Partition for this option.
How to format a basic volume using Windows Disk Management
• From the Disk Management window, right click the partition you want to format

• Specify the Volume Label, File System or Allocation unit size . Default settings can be kept if you do not wish to change any details.
• Click Ok
• Click Ok one more time to confirm formatting process.
How to delete a partition using Windows Disk Management
• From the Disk Management window, right click the Partition or Logical Drive you want to delete by selecting Delete Partition or Delete Logical Drive .
• Click Yes to confirm deletion
How to change the partition size
There is no way Windows Disk Management can help you resize the existing partition size. However, you can use software to do so (PowerQuest, Partition Magic or Acronis are recommended). Another method is to use the bootable Windows CD to re-partition the drive capacity.


